
You have fitted the drive and closed the case. Now what? After you install a new SSD, the short version is this: confirm your PC sees it, then either install Windows fresh onto it or clone your old drive, set it as the boot disk, and make sure the firmware and TRIM are current. The rest is tidying up.
Most of this takes an afternoon at most, and a lot of it is Windows doing the work for you. Here is the full order to follow, with the parts you can safely relax about called out along the way.
First, check that your PC actually sees the SSD
Before anything else, make sure the drive shows up. If your PC cannot see it, no other step will work.
Restart and open your BIOS or UEFI setup. You get there by tapping a key as the PC starts, usually Delete, F2, or Esc, depending on your motherboard. Look in the storage or boot section for a list of connected drives. Your new SSD should be listed by its model name and size.
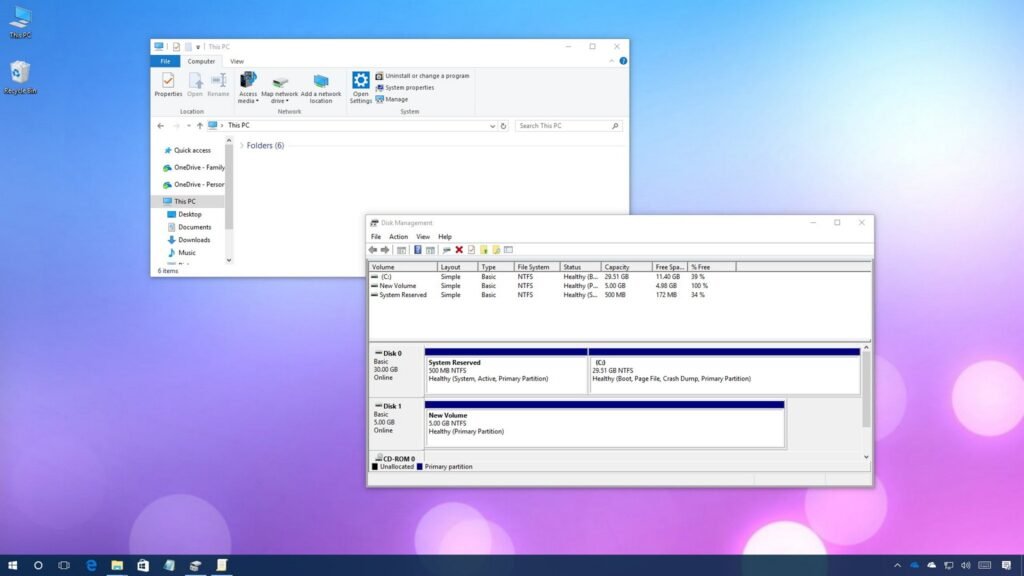
If Windows is already running, you can check inside it instead. Press the Windows key + R, type diskmgmt.msc, and press Enter. This opens Disk Management, and a new drive will appear at the bottom, often marked as unknown or not initialised. Seeing it here is good news; it means the hardware is fine.
Not showing up at all? Power the PC down and re-seat the drive. For an M.2 SSD, check the small screw is holding it flat in the slot. For a SATA SSD, press both the data and power cables firmly at each end.
Decide: fresh Windows install or clone your old drive?
This is the big fork in the road, and it decides most of what you do next. You have two sensible paths, and the right one depends on whether this SSD is replacing your main drive or just adding space.
Path A: a clean Windows install
A fresh install gives you the fastest, cleanest result. Nothing carries over, so there is no old clutter, no leftover programs, and no slow habits from your last setup. It is the best choice if your old drive was getting sluggish or you simply want a clean start.
You make a Windows installer on a spare USB stick using Microsoft’s Media Creation Tool, plug it in, and boot from it. Windows walks you through the rest and installs straight onto the SSD. The trade-off is that you reinstall your programs and copy your files back by hand afterwards.
Path B: clone your old drive
Cloning copies your entire current drive, Windows, apps, settings and all, onto the new SSD exactly as it is. You boot up afterwards and everything looks the same, just faster. This suits you if you have a lot of installed software you do not want to set up again.
You do this with free cloning software from your SSD’s maker, or a general disk tool. Connect both drives, pick the old one as the source and the new SSD as the target, and let it run. One catch: the new SSD needs to be at least as big as the used space on your old drive, or the clone will not fit.
| Situation | Do you reinstall Windows? | What actually happens |
| Fresh, clean install | Yes, install Windows onto the SSD | You get the cleanest, fastest result with no leftover junk |
| Keep your old setup | No, clone your old drive instead | Your files, apps and settings move over as they were |
| SSD is a second drive | No | Windows stays where it is; the SSD adds extra space |
If the SSD is a second drive purely for extra storage, you skip both paths. Leave Windows where it is and jump ahead to initialising the drive.
Set the SSD as your boot drive
If the SSD is now your main drive, your PC needs to be told to start from it. Otherwise it may keep booting from the old drive, and you will wonder why nothing feels faster.
- Restart and enter the BIOS or UEFI with the same key as before (Delete, F2, or Esc).
- Find the Boot menu or boot order section.
- Move your new SSD to the top of the list so it boots first.
- Save and exit. The PC restarts from the SSD.
After a clean install this often sorts itself out, but it is worth checking. If you cloned your drive, this step is what makes the speed boost real. A common mix-up here is booting from the old drive by accident, which makes the whole upgrade feel pointless because Windows is still loading from the slower disk. Setting the boot order removes that doubt.
Once you have confirmed the SSD boots reliably a few times over, you can safely wipe the old drive and reuse it for storage. Give it a day or two of normal use first, just to be sure nothing was missed in the move. There is no rush to erase the old drive, and keeping it intact for a short while is a free safety net.
Initialise and format a second (data) SSD
If the SSD is a fresh second drive for storage, it will not work until you initialise and format it. A brand-new drive has no structure on it yet, so Windows cannot write to it. This step does not apply to a drive you cloned or clean-installed onto, since that gets set up during the process.
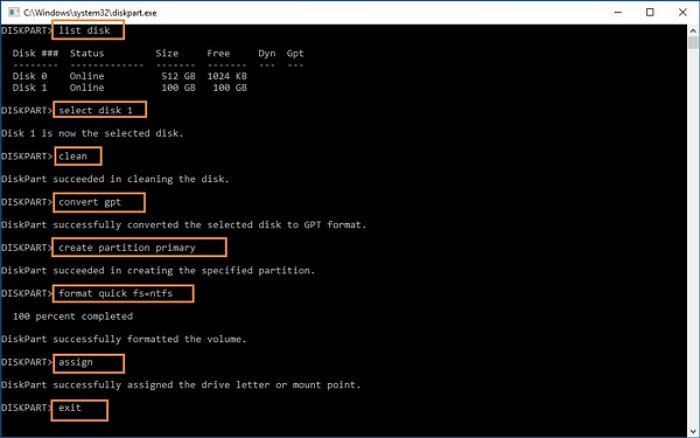
Open Disk Management again (Windows key + R, then diskmgmt.msc). Your new drive shows as not initialised.
- Right-click the new disk and choose Initialise Disk.
- Pick GPT as the partition style. It is the modern standard and works with drives larger than 2TB.
- The drive now shows as unallocated. Right-click that space and choose New Simple Volume.
- Follow the prompts, keep the file system as NTFS, give the drive a letter, and finish.
The drive now appears in File Explorer, ready to use. The whole thing takes a couple of minutes.
Update the SSD firmware
Firmware is the small built-in program that runs your SSD. Makers release updates that fix bugs and sometimes improve speed or reliability, so it is worth checking once when the drive is new.
Each brand has its own free tool. Samsung drives use Samsung Magician, and Crucial drives use Crucial Storage Executive. Install the tool for your brand, open it, and it will show the drive’s current firmware and whether a newer version exists. If one does, apply it through the tool.
Back up anything important before a firmware update. The process usually leaves your data untouched, but a backup means a rare hiccup costs you nothing. Do not turn off the PC while it runs.
If your SSD came from a smaller or less known brand, check its support page for a similar utility. If there is no tool and no update listed, your drive is almost certainly on the latest firmware already, and you can move on.
Check that TRIM is on
TRIM is a command that keeps your SSD fast over time. It tells the drive which blocks of data are no longer in use, so the drive can clear them in the background and stay quick to write to. Without it, an SSD slowly gets slower as it fills and empties.
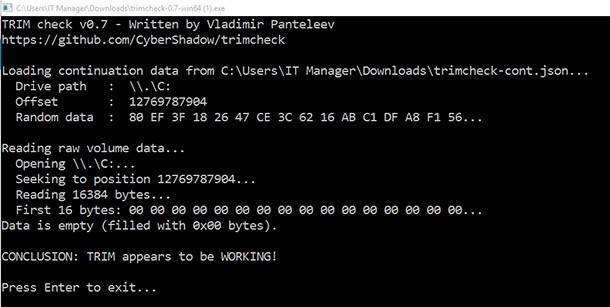
The good news: on Windows 10 and 11, TRIM is switched on by default for SSDs, so most people never touch it. To confirm, open Command Prompt as an administrator, type fsutil behavior query disabledeletenotify, and press Enter. A result of 0 means TRIM is on and you are done.
If you see a 1, turn it on with fsutil behavior set disabledeletenotify 0. That is the only time you need to act.
You do not need to run TRIM by hand. Windows already runs it on a weekly schedule as part of drive optimisation, which keeps the SSD healthy without you thinking about it.
Skip defragmenting, and other habits to drop
Some advice made for old hard drives actively works against an SSD. If you are coming from an HDD, these are the habits to leave behind.
- Do not defragment the SSD. Defragmenting rearranges data to sit close together, which helped spinning hard drives but does nothing for an SSD and adds pointless wear. Windows already knows the difference and runs TRIM instead of a defrag on SSDs.
- Leave scheduled optimisation on. In the Optimise Drives tool, your SSD should be labelled as a solid state drive and kept on a weekly schedule. That schedule is what runs TRIM, so keeping it on is helpful, not harmful.
- Do not fill it to the brim. An SSD needs some free space to work at full speed. Leaving roughly 10 to 15 percent empty keeps write performance steady.
- Ignore old tweak lists. Turning off features like search indexing or the page file rarely helps modern drives and can cause more problems than it solves.
Move your files and free up space wisely
With the drive set up, you can put it to work. How you do this depends on which path you took earlier.
After a clean install, copy your documents, photos and other files back from your backup or old drive. Reinstall the programs you use, starting with the ones you rely on daily. Take the chance to skip the software you never opened on your old setup.
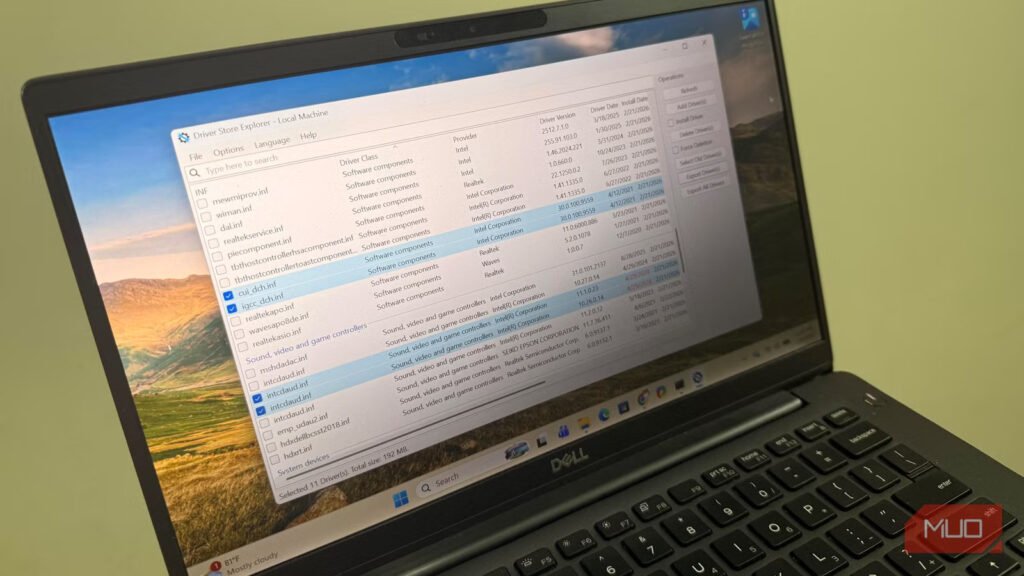
If you have both an SSD and a larger hard drive, use each for what it does best. Keep Windows, your programs and the games or apps you open most on the SSD, where speed matters. Put large files you rarely touch, like video archives or old photo libraries, on the hard drive. You can even point the default save location for downloads and documents to the larger drive through Settings > System > Storage.
It also pays to set up a simple backup at this point, while the drive is fresh and you are already thinking about your files. An SSD is reliable, but no drive lasts forever, and the easiest time to start a backup habit is right now. An external drive or a cloud sync for your most important folders is enough for most people.
Finally, run through your programs and files once to confirm everything opens and works as expected. Open the apps you use daily, check that your documents and photos are where you expect, and restart the PC one more time to make sure it boots cleanly. That quick check is the difference between assuming the job is done and knowing it.
Frequently asked questions
Do I have to reinstall Windows after installing a new SSD?
Only if you want to. A clean install gives the tidiest result, but you can clone your old drive instead to keep Windows, your apps and settings exactly as they were. If the SSD is just extra storage, you leave Windows alone.
Why is my new SSD not showing up?
Usually a loose connection or an uninitialised drive. Re-seat the M.2 or SATA cables, then open Disk Management. If it appears there as not initialised, initialise and format it. If it is missing from the BIOS too, recheck the physical fit.
Do I need to enable TRIM myself?
Almost never. Windows 10 and 11 turn TRIM on by default for SSDs. To check, run fsutil behavior query disabledeletenotify in an admin Command Prompt. A result of 0 means it is already on.
Should I defragment my SSD?
No. Defragmenting helps old hard drives, not SSDs, and only adds wear. Windows automatically runs TRIM in place of a defrag on solid state drives, so leave the scheduled optimisation on and do nothing else.
How full can I let my SSD get?
Try to keep at least 10 to 15 percent free. SSDs need spare room to write at full speed, so a drive packed to capacity will feel slower. Move large, rarely used files to a second drive if space gets tight.
Conclusion
Setting up a new SSD comes down to a short, ordered list: confirm the PC sees the drive, choose between a clean Windows install and a clone, set it as the boot disk, and initialise it if it is a second drive. Then update the firmware, confirm TRIM is on, and skip old hard-drive habits like defragmenting. Do those, and a good result looks like a PC that boots in seconds and stays fast for years.
Related Post:
Can You Recover Data From an SSD? What Actually Works
How to Partition an SSD: Windows, Mac, and When to Skip It
What to Do After Installing a New SSD
SSD Showing as Unallocated? What It Means and How to Fix It Safely
How to Copy an SSD to a Larger SSD Without Reinstalling Windows