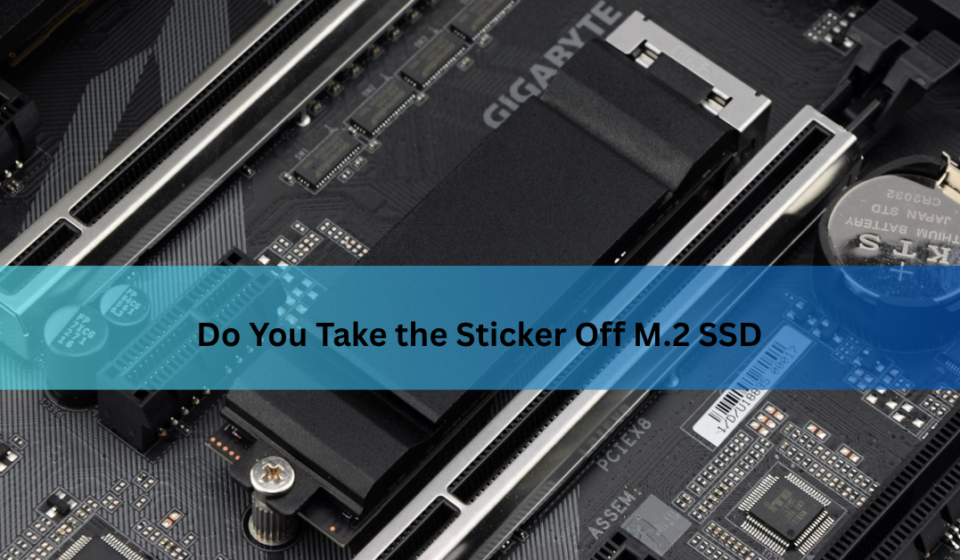

If you have ever unboxed a brand new M.2 SSD, you have probably paused for a second at that label stretched across the top of the drive. It looks official, sometimes it even has warning text printed on it, and it is not always obvious whether you are supposed to peel it off or leave it exactly where it is. This is one of those small questions that trips up first-time builders and experienced PC enthusiasts alike, and the honest answer is that it genuinely depends on what kind of sticker you are looking at.
This guide walks through everything you need to know about do you take the sticker off m.2 ssd, including why these stickers exist, when removing one is perfectly safe, when you should leave well enough alone, and how to do it properly if you decide to go ahead.
Quick Answer
Whether you should take the sticker off an M.2 SSD depends entirely on what type of sticker it is. If it is a simple paper label used for identification, like a model number, serial number, or QR code, removing it is generally safe and will not affect performance. If the sticker doubles as a thermal pad or heat spreader, or if it is explicitly marked as a warranty seal, removing it can either hurt cooling performance or void your warranty, so it is worth thinking twice before peeling it off.
Why Do M.2 SSDs Have Stickers in the First Place?
Manufacturers do not add these labels randomly. They typically serve one or more specific purposes, and understanding which purpose applies to your drive is the key to answering this question correctly.
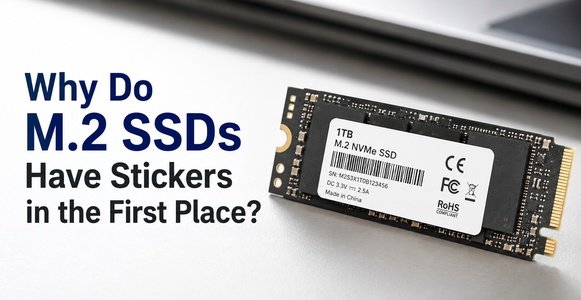
The most basic reason is simple identification. Every SSD needs a way to display its model number, serial number, and often a QR code used for warranty lookups or support purposes. This type of label is usually just printed paper or thin plastic film with no functional role beyond information display.
Beyond identification, some stickers serve a genuine thermal purpose. Certain manufacturers design their labels with a thin metal foil layer built in, turning what looks like an ordinary sticker into a lightweight heat spreader that helps pull heat away from the NAND flash chips and controller underneath. On these drives, the sticker is not just cosmetic, it is doing real thermal work.
Other stickers exist purely as warranty or tamper-evident seals, often printed with language like “warranty void if removed.” These are placed there specifically to indicate whether the drive has been opened or tampered with, and manufacturers use them to protect against fraudulent warranty claims. Finally, some drives ship with a thin protective film meant only to keep tiny surface-mounted components safe during shipping and handling, which is generally fine to remove once the drive is out of its packaging.
The Different Types of M.2 SSD Stickers
Not every sticker looks or behaves the same way, and telling them apart is easier once you know what to look for. A plain paper label typically feels thin, prints clearly, and often lets a little light through if you hold it up. This type is almost always safe to remove.
A thin adhesive or protective film, sometimes placed over delicate components purely for shipping protection, is also generally fine to peel away once your drive is installed and ready to use.
A thermal pad or conductive sticker feels noticeably different. It often has a slightly rubbery or squishy texture, sometimes with a metallic sheen, and it is doing actual thermal work rather than just displaying information. Treat this type with caution.
Finally, a warranty void seal is usually marked clearly with printed text warning you about tampering. Whether removing it actually affects your warranty depends heavily on the specific manufacturer, which we will cover in more detail shortly.
Here is a simple reference table to help you sort out what you are dealing with.
| Sticker Type | How to Identify It | Safe to Remove? |
| Paper identification label | Thin, printed, sometimes semi-transparent | Yes |
| Protective shipping film | Thin plastic, no printed warnings | Yes |
| Thermal pad/conductive sticker | Rubbery or metallic texture, feels thicker | Caution — may affect cooling |
| Warranty void seal | Explicit “warranty void if removed” text | Caution — may affect warranty |
When It’s Safe to Remove the Sticker
There are a handful of situations where removing the sticker makes sense and carries minimal risk. If you are installing a dedicated aftermarket heatsink, direct contact between the heatsink and the bare chips almost always transfers heat more effectively than leaving a sticker layer in between, even a thin one. In these cases, removing a purely cosmetic paper label before mounting the heatsink is a common and generally accepted practice among PC builders.
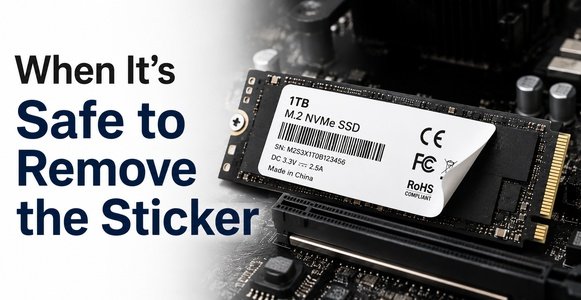
If you have confirmed the sticker is nothing more than a paper identification label with no thermal or warranty function, there is little reason to worry about removing it. Likewise, if your case has notably poor airflow and you are trying to squeeze out every bit of thermal headroom you can, removing a non-essential sticker before adding cooling can be a reasonable part of that effort.
When You Should Leave It On
On the flip side, there are just as many situations where leaving the sticker alone is the smarter move. If you are not installing any heatsink at all, there is genuinely no benefit to removing the sticker, since it is not blocking anything and your case airflow alone will handle typical cooling needs for a drive under normal loads.
If the sticker is functioning as a heat spreader, removing it without replacing it with a proper heatsink can actually make thermal performance worse, not better, since you would be stripping away whatever passive cooling benefit it was providing. And if the label is explicitly marked as a warranty seal by a manufacturer known to strictly enforce that policy, removing it while your drive is still under active warranty introduces unnecessary risk, especially if you might ever need to file an RMA claim down the line.
Does Removing the Sticker Affect Warranty?
This is genuinely one of the murkier parts of the whole question, because policies vary quite a bit from one manufacturer to another. Some companies have historically taken a strict stance, treating any removed seal as evidence of tampering that voids coverage. Others have moved away from this approach entirely in recent years, partly due to ongoing consumer pushback against “warranty void if removed” stickers in general, and partly because manufacturers realized these policies were difficult to enforce fairly in the first place.
Because there is no single universal rule here, the safest approach is to check your specific manufacturer’s documentation or contact their support team directly if you are uncertain. This is especially worth doing if your drive is still relatively new and warranty coverage still has meaningful time left on it.
Does Removing the Sticker Actually Improve Cooling?
If your main motivation for asking do you take the sticker off m.2 ssd is thermal performance, it helps to know what kind of difference this actually makes in practice. Enthusiast testing and hands-on comparisons have generally found that removing the sticker before installing a proper heatsink can lower temperatures somewhere in the range of five to ten degrees Celsius under sustained load, though the exact number varies depending on the drive, the heatsink quality, and overall case airflow.
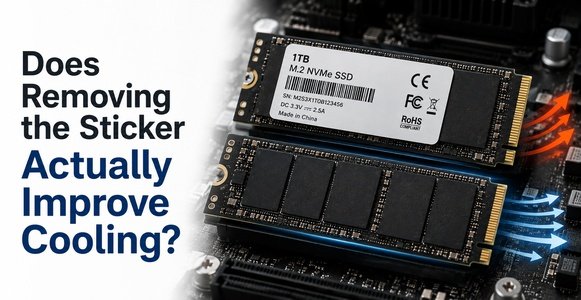
The logic behind this makes sense once you think about it. A sticker, even one with a thin metal foil layer, simply cannot conduct and spread heat as effectively as a dedicated heatsink making direct contact with the chips themselves. That said, if you are not installing any additional cooling at all, removing the sticker on its own typically will not produce a meaningful temperature improvement, since you are not replacing it with anything better.
Risks of Removing the Sticker
Before reaching for a fingernail or a plastic pry tool, it is worth understanding what can go wrong. Physically damaging surface-mounted components during removal is a real risk, particularly if the sticker is stuck firmly to the board and you apply too much force while peeling.
There is also a more technical concern worth taking seriously if you plan to mount a metal heatsink directly onto the bare drive. Some of these stickers act as an electrical isolation layer between exposed circuitry and whatever sits on top of it. Removing that layer and then placing a bare metal heatsink directly against the board, without adding a proper thermal pad in between, can create a risk of short-circuiting sensitive components. This is exactly why experienced builders generally recommend adding a dedicated thermal pad between the drive and any metal heatsink, rather than relying on direct metal-to-board contact.
Adhesive residue left behind after removal is a more minor, but still annoying, issue. And of course, there is the warranty risk already discussed, which varies depending on your specific manufacturer’s policy.
How to Safely Remove an M.2 SSD Sticker
If you have weighed the considerations above and decided removal makes sense for your situation, doing it carefully will help avoid unnecessary damage. Here is a general process to follow.
- Gather your tools first: a plastic pry tool or old gift card edge works well, along with isopropyl alcohol and a soft cloth or cotton swab for cleanup.
- Warm the sticker slightly if the adhesive feels stubborn. A hairdryer on its lowest heat setting, held a short distance away for a few seconds, can loosen strong adhesive without risking heat damage to the drive.
- Start peeling from one corner slowly, using the plastic tool to gently lift the edge rather than pulling directly with your fingers, which reduces the risk of tearing components underneath.
- Peel at a shallow angle rather than straight up, moving slowly across the length of the sticker instead of yanking it off in one motion.
- Clean any leftover adhesive residue using a small amount of isopropyl alcohol on a cloth or cotton swab, wiping gently rather than scrubbing.
- If you are installing a heatsink afterward, add a proper thermal pad between the bare drive and the heatsink rather than relying on direct contact, especially if the heatsink is made of metal.
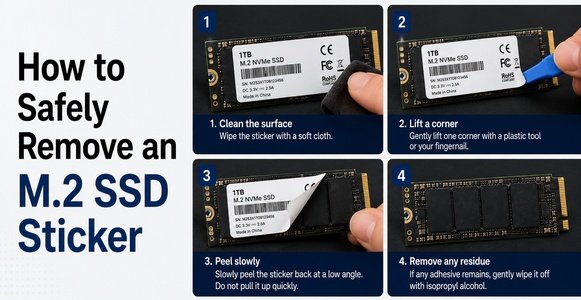
Taking your time during this process matters more than speed. Rushing the peel is the most common way people end up damaging a chip or leaving behind adhesive residue that becomes harder to clean later.
Should You Remove It? Quick Decision Guide
| Your Situation | Recommendation |
| Installing a dedicated aftermarket heatsink | Generally safe to remove, add a thermal pad afterward |
| Not installing any heatsink | Leave it on — no real benefit to removing it |
| Sticker functions as a heat spreader, no heatsink planned | Leave it on |
| Drive still under active warranty, brand enforces strict policy | Leave it on or check with manufacturer first |
| Drive out of warranty, sticker is just a paper label | Safe to remove |
Manufacturer-Specific Notes
Policies genuinely differ from brand to brand, and it is worth doing a quick check before assuming your drive follows the same rules as a friend’s or a forum post you read. Some manufacturers have a reputation for stricter enforcement around their tamper-evident stickers, while others have been more relaxed or have moved away from strict enforcement altogether in recent years. Rather than relying on general assumptions, the most reliable approach is checking your specific manufacturer’s official documentation, or reaching out to their support team directly, especially if your drive’s warranty period still has significant time remaining.
Frequently Asked Questions
Do all M.2 SSDs have stickers?
Most do, though the type and purpose of the sticker varies by manufacturer and model. Some are purely for identification, while others serve thermal or warranty purposes.
Will removing the sticker damage my SSD?
Not if done carefully. The main risks come from applying too much force during removal or from creating an electrical short by mounting a bare metal heatsink directly onto exposed circuitry without a thermal pad in between.
Does the sticker affect SSD performance if left on?
For drives without any additional cooling installed, leaving the sticker on typically has minimal impact on everyday performance. It becomes more relevant specifically when you are trying to maximize cooling with a dedicated heatsink.
Can I put a heatsink over the sticker instead of removing it?
Yes, this is possible and some users choose this route, though it generally results in less effective heat transfer compared to removing the sticker and adding a proper thermal pad directly against the drive.
Does removing the sticker void warranty on every brand?
No. Policies vary by manufacturer, and some brands have moved away from strictly enforcing this rule in recent years. Checking your specific manufacturer’s policy is the most reliable way to know for sure.
Conclusion
So, do you take the sticker off m.2 ssd? The real answer is that it depends on what kind of sticker you are dealing with and what you plan to do with the drive. A simple paper identification label is usually fine to remove, especially if you are installing a proper heatsink afterward. A thermal pad, heat spreader, or clearly marked warranty seal deserves more caution, particularly if your drive is still under warranty. When in doubt, take a close look at the sticker itself, check your manufacturer’s specific policy, and remove it carefully if you decide it makes sense for your setup.
Related Post:
Is There a Side Effect to Low Power NVMe SSD? A Complete, Easy-to-Understand Guide
Is SSD With Heatsink Worth It? A Complete Guide
How Much Free Space Should You Leave on Your SSD?
SSD Showing as Unallocated? What It Means and How to Fix It Safely
How to Copy an SSD to a Larger SSD Without Reinstalling Windows